Here are some gardening hacks to use in your garden.
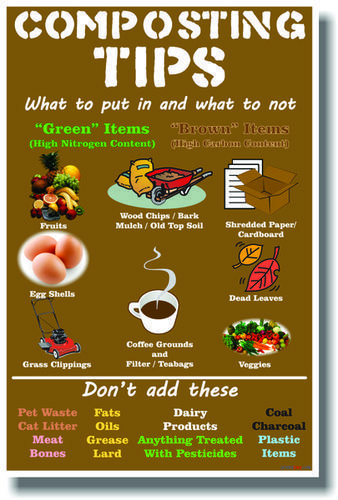
Adding coffee grounds to the soil in your garden is a great way to enrich it with nitrogen, which encourages microorganism growth in the soil. Using coffee grounds seems to deter snails and slugs that may cause damage to your plants.
Egg shells can be a great way to deter slugs from feeding on your vegetables plants. Simply put cracked egg shells at the base of your plants, and they will not want to crawl over the sharp shells.
A great way to discourage pests from getting too close to your plants is to place a layer of foil around the plants. Many insects do not like metal surfaces, so this would prevent most pests from reaching the stems of your plants especially squash bores. Make sure it is shiny side up, as this will also serve as a method of reflecting the sunlight back to the plant.
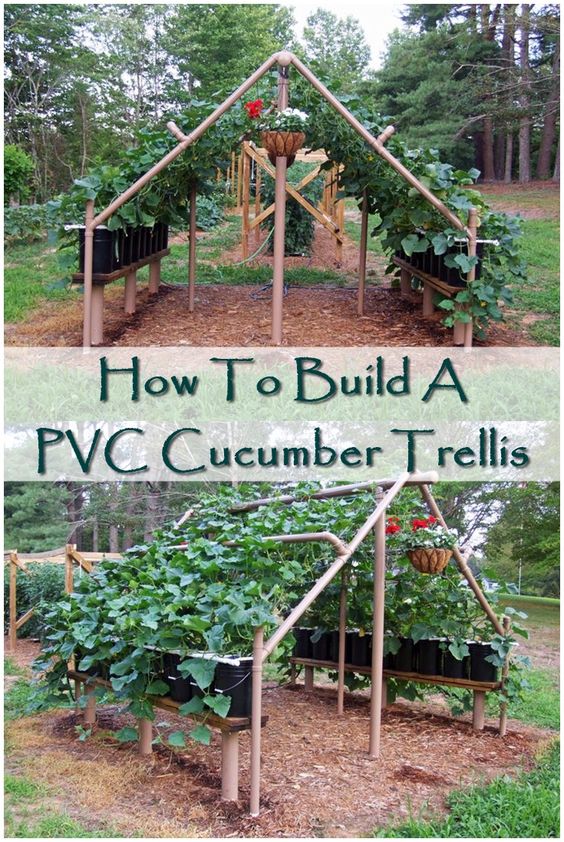
If you don’t have a lot of space for a garden, it is best to create vertical growing space instead of overcrowding an area on the ground, as this hinders the growth of the vegetables that you plant. If you allow certain plants to grow upwards, such as tomatoes and cucumbers, it can also protect them from soil born pests that may stunt their growth.
Make a tool holder from a terracotta pot and add abrasive sand, and mineral oil in that. It will not only hold your garden tools as you thrust them in but the sand and mineral oil mixed in it also clean and sharpen them at the same time.
When you boil or steam some vegetables on the stove top, don’t pour the water down the drain. Once the water has cooled, pour this vegetable water in your plants to fertilize them instead of wasting it. You can also do the same with your boiled egg water.
Deadhead spent flowers from your plants to promote more blooms and remove top shoots and emerging flowers of your herbs to help them have a healthy growth and prevent bolting. Also, most of the new gardeners avoid pruning their plants but it is important too and helps in rejuvenating the growth of plants.
If weeds are surfacing in your garden do this: Before you put a layer of mulch on your planting beds, cover the garden bed with newspapers and then drop a layer of mulch to smother the weeds or use old carpet for paths between the beds like I have done.