People are having issues with tomato leaf curl. There are no easy answers without looking at the leaf itself and doing some detective work.
- If the leaves are distorted with brown spots and the leaves are turning yellow. Answer: foliar disease, most likely fungus, Septoria leaf spot or early blight.
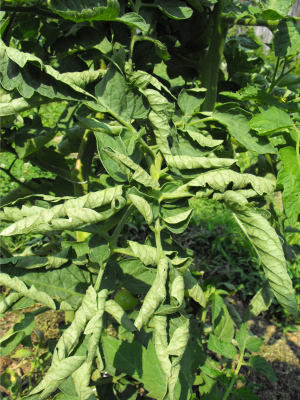
- Leaves are curling upward looking like a green cigar. Answer: Do not worry. The plant foliage is growing faster than the roots, so the plant naturally curls its leaves upward to reduce solar exposure. The plant will grow out of this, mulch and consistent watering helps.
- Newer leaves are curling and growing in distorted shapes. Answer: Herbicide injury due to drift or mulch that was sprayed. Water movement with Roundup has been a problem. You will see the same effect in peppers and other garden plants.
- Leaves wilt downward. Answer: Maybe a virus, however, with newer tomato varieties, this is not as common as it once was.
- Plants are stunted growing in part shade. Answer: Most tomatoes need 8 hours of sunlight. Do not plant close to a Black Walnut for the tree roots will kill or stunt most tomatoes.
- Leaves are limp and yellow with green veins. Answer: Iron deficiency.
- Leaves curl on the edges with a burn pattern: Answer: Too high of a dose on Malathion or sprayed above 85 degrees.