Growing herbs are easy to grow; all you need is a windowsill. And, unlike in retail stores, you get to choose from hundreds of different varieties of plants which can be overwhelming. For example most people love Basil and the varieties are many, like the tiny leaves of Ocimum basilicum ‘Pluto’ pack a mighty punch; O. basilicum ‘Mrs Burns’ is by far the best lemon; and O. basilicum ‘Dark Opal’ is the best purple, with spicy, warm flavors.
Basil is my favorite indoor herb, but parsley and chives can be treated in the same way. A packet of seed will cost around the same as a shop-bought plant and, sown judiciously, will last a year. You will have to buy potting soil and find a pot, but even with these costs you will save money over the year.
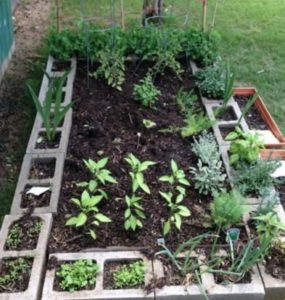
I like larger containers that I can plant 3 types of herbs in it. I have taken them outside during the summer and brought them indoors in the late fall and placed them on the porch with the south windows. I have done this for 4 years now with the same plants. Plants include curry, different oregano and thyme, rosemary, lemon balm, lemon grass, and salvia. I use smaller pots for different sowing of basil and chamomile.

Sow the seeds liberally across the surface of your pot (you want them roughly ½ inch apart) covered very lightly, water in well and cover with a transparent plastic bag. Within a week, you will have the first signs of growth. Now place the pot in sunlight and transplant when big enough. The more sun the better.
Parsley
Parsley is a mild bitter herb that can enhance the flavor of your foods. Many consider parsley just to be a curly green garnish for food, but it actually helps things like stews achieve a more balanced flavor. As an added benefit, parsley can aid in digestion.
Mint
There are several varieties of mint. You can use it in drinks like mojitos or mint juleps. Or add some mint to your summer iced tea. Mint freshens the breath and will help to calm your stomach. But if you grow mint, remember that it’s considered an invasive plant. Mint will spread and take over your garden. It’s best grown in containers.
Dill
Dill is a great flavoring for fish, lamb, potatoes, and peas. It also aids in digestion, helps to fight bad breath and has the added benefits of reducing swelling and cramps. Dill is easy to grow. It will also attract helpful insects to your garden such as wasps and other predatory insects
Basil
Whether you choose large leaf Italian basis or large purple sweet basil, this plant is popular in many cuisines but is a feature in Italian cooking like pizzas, salads, sauces and pesto. Basil is great topped on tomatoes with a light cheese. Basil has health benefits of antioxidants and is a defense against low blood sugar.
Sage
Sage is an aromatic herb that is great for seasoning meats, sauces and vegetables. But be careful because sage will have a tendency to overpower other flavors. Sage also helps to relieve cuts, inflammation and helps with memory issues. It was once thought to be a medicinal cure-all. Sage is an easy herb to grow and is relatively easy to care for. It’s great in your garden for attracting bees.
Rosemary
Rosemary is one of the most flavorful herbs and is great for adding to things like poultry, meats and vegetables. Around Christmastime you’ll see tree shaped rosemary bushes for sale. You can bring them home and keep them for planting in the spring. The fragrant plant is a delightful scent and is sometimes used in floral arrangements. Rosemary likes its soil a bit on the dry side, so be careful not to overwater. Allowed to flourish, a rosemary plant will grow into a full-sized bush, however you must take it inside in the winter.
Thyme
Thyme is a delicate looking plant. It is often used for flavoring egg, bean and vegetable dishes. Thyme is frequently used in Mediterranean, Italian and Provençal French cuisines. Pare it with lamb, poultry and tomatoes. Thyme is often added to soups and stews. Thyme is part of the mint family. The most common variety is garden thyme which has gray-green leaves and a minty, somewhat lemony smell.
Cilantro/Coriander
Cilantro (I intensely hate the smell and favor, however most people like it) It is also known as coriander leaf or Chinese parsley. Cilantro is perfect for adding into spicy foods like chills, and Mexican, Chinese, Southeast Asian and Indian cuisines. The seeds of cilantro are known as coriander. The plant grows early in the season and doesn’t like it when the ground becomes too warm
Fennel
Fennel is very flavorful and aromatic, and along with anise is a primary ingredient in absinthe. Fennel is native to the Mediterranean region and does beset in dry soils near the ocean or on river banks. The strongly flavored leaves of fennel are similar in shape to dill. The bulb can be sautéed or grilled or eaten raw. Fennel bulbs are used for garnishes or sometimes added to salads.
Chamomile
In the United States and Europe chamomile is most often used as an ingredient in herbal tea. It is one of the world’s most widely consumed herbal teas. But it has also been used for thousands of years as a traditional medicine for settling stomachs and calming the nerves. Chamomile also helps reduce inflammation and treat fevers. You can grow either German chamomile or Roman chamomile. The two are interchangeable when it comes to making tea, but they are grown very differently. German chamomile is an annual plant that grows up to three feet tall. Roman chamomile is a perennial, but only grows to about a foot high. German chamomile is more commonly known for its blossoms
Lavender
Grown as a condiment and for use in salads and dressings, lavender will give most dishes a slightly sweet flavor. Lavender syrup and dried lavender buds are used in the United States for making lavender scones and marshmallows. Health benefits include the soothing of insect bites and headaches when used with herbs and aromatherapy. Lavender plants will survive in many growing conditions especially a protected site in the winter, but does best in full sun in warm, well-drained soil.
Catnip
What’s more fun that seeing the family cat go slightly berserk over the smell of catnip? But catnip is more than a feline stimulant. It can be used as a relaxing agent as well as a diuretic and laxative. If you plant catnip outside, remember that cats do love to roll in it and chew on it. But keeping catnip in your garden can also be a deterrent for rodents. If the cat’s around, the pests most likely won’t be.
Chives
Chives are a member of the garlic family and can be the perfect complement to sour cream. Chives are mostly used for flavoring and are considered one of the “fine herbs” of French cuisine. Chives are native to Asia but have been used as an additive to food for almost 5,000 years. Chives work well with eggs, fish, potatoes, salads, shellfish and soups. Chives are an excellent source of beta carotene and Vitamin C.
Peppermint
Like other mints, peppermint is known for aiding digestion and freshening the breath. But peppermint is also a good source of calcium, potassium and Vitamin B. Peppermint is a hybrid mint, being a cross between water mint and spearmint. Peppermint oil can be used for flavoring but is also useful as a natural pesticide. It has been shown to reduce the effects of irritable bowel syndrome. Peppermint prefers rich soil and partial shade. Like other mints, it spreads quickly, so consider planting it in containers.
Stevia
Stevia is an attractive looking plant and a natural sweetener. The added benefit is that there are no calories. Stevia is part of the sunflower family and is native to subtropical and tropical regions in the Western hemisphere. While it’s a perennial plant it will only survive in the milder climates in North America. Still you can add stevia to your garden for the summer. It is also known as sweetleaf or sugarleaf and is grown for its sweet leaves. Stevia can be used as a natural sweetener and as sugar substitute.
Aloe Vera
Aloe Vera is known for its soothing properties for burns or skin problems. Many people keep an Aloe Vera plant handy in the kitchen for incidental burns. But taken orally, Aloe Vera will also help with digestion, circulation and weight loss. There are over 250 species of Aloes. Most of these are native to Africa. Aloe Vera plants are very succulent and are as much as 95% water. That means they are very sensitive to frost. In warm climates, they should be in full sun or light shade. But you may have more success with this plant by keeping it indoors in a sunny window.
Lemongrass
Lemongrass stalks can provide antioxidants such as beta carotene and a defense against cancer and eye inflammation. Lemongrass has as strong lemon flavor. You can brew it in tea as well as use it as an herb seasoning. To grow this outdoors, you need to live in at least Zone 9. Outside it can grow up to six feet high but will be notably smaller if you grow it indoors.
Oregano
Oregano is also part of the mint family and is native to the warm climates of Eurasia and the Mediterranean. Oregano is a perennial plant but in colder climates can be grown as an annual. It is sometimes called wild marjoram and is closely related to sweet marjoram. Oregano is used for flavoring and is a staple herb of Italian American cuisine. In the United States it gained popularity following World War II as soldiers returned home with a desire for the “pizza herb.”