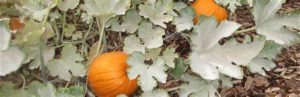
Good Fences Make Good Neighbors

Your yard is an important part of your home; you use it for hosting parties, spending a quiet evening after work and even for attracting wildlife. In any case, most homeowners like to maintain backyard and front yard privacy. So today we will be discussing some inexpensive backyard privacy ideas and landscaping options to block neighbors out.

A fence or privacy screen is the easiest way to block neighbors’ view of your yard. There are a couple of things to consider when building a fence or screen- the height and location. The zonal planning rules regulate both these factors. If you plan on building a very high fence, you will need special permits for the same. Contact your town office before starting the project. In general, fences are great at blocking the view of your yard and help keep noise out. You can have wooden or metal fences these days. Brick fences are also great. Add vines and vegetation or other whimsical and personal details like finials ad post caps to a basic, plain Jane fence to make it stand out.

Vegetation

Shrubs and trees are inexpensive landscaping ideas to block neighbors. Evergreens are great too; they offer year-round privacy around your backyard or your BBQ area. You can also add sturdy shrubs around the evergreens to create an impenetrable privacy screen. Trees, shrubs and vines also provide shade and windbreak thereby reducing your cooling and heating demands.

Hedges

Planting a hedge, includes picking the right plant (How high will it grow? What kind of light does it need? How often should it be watered and pruned?) and then planting it. Various junipers and evergreens are the classic choices for hedges, but flowering bushes like lilac can grow 8 feet tall too.

Thorny buffers

Buffers made with thorny plants make great cheap ways to block neighbors view and keep trespassers away. Add them between your home and the alley, at the base of a window and any other place where you are worried about trespassers. Thorny plants like barberry come in various sizes and colors.

Climb Plants on a Trellis

You’ll need to diligently care for the plants as they grow and creep upward, but you won’t have to wait long for the plants to grow tall if use silver lace clematis, trumpet vine, climbing honeysuckle or hops.

Lattice privacy planters

These are cheap ways to block neighbors view. You can add plants in them like miscanthus grass that works well as it grows fast and tall. Lattice privacy screens with raise planting bed are great.

Curtains

Just as valuable in your backyard as they are in the bedroom, a few opaque panel curtains will both block your view of neighbors and further establish the sense of an outdoor room. If you’re able to mount them, curtain rods are the easiest way to keep your panels in place. Consider hanging curtains along the sides of a porch, pergola, or custom corner.

Metal

Corrugated metal is one of the more modern fencing options on the market. Its industrial quality seriously shields your backyard from curious onlookers while contributing yet one more texture to the common palette of stone, gravel, and concrete. Found at home improvement stores and purchased in budget-friendly sheets, these metal fences are also extremely durable, ensuring a long-lasting privacy solution for your space.

Wood

Common in neighborhoods across the country, wood fences are practically an outdoor staple. With a variety of woods to choose from, ranging from light to dark, and just as many style choices, wood fencing does more than boost backyard privacy—it also boosts design. Compared with other fencing materials, wood is also relatively inexpensive and, with proper construction and routine maintenance, long lasting. So long as you have basic woodworking knowledge, a DIY wood privacy fence is well within reach.


Cleome, a No Problem Flower

“What’s that unusual plant?” is a question that almost always indicates someone has just spied the cleome blooming in my garden. I enjoy watching their eyes widen when I tell them they are “spider flowers.” Cleome common name captures how the whiskery blooms seem to explode from the top of the stems. I can always count on these fanciful flowers to add an element of surprise to my garden.

If you want an easy source of big, beautiful swaths of color, cleomes are a fast way to get there. A few years ago, most cleomes were found growing in the back of the border to accommodate their tall and lanky (5-6 feet) height which I still grow (the purples are best). But these days, there are several new varieties that are more compact in form. These newcomers are sporting a host of fresh colors creating a renewed interest in these old fashioned annuals.

Proven Winners Senorita Rosalita Cleome One of the newest cleomes to make its debut is Senorita Rosalita. Along with a memorable name, this annual is out to prove that less is more. While many of the other cleomes share a list of common traits: spiny stems, foliage with a pungent aroma and flowers that ripen into seedpods that freely reseed themselves; Senorita Rosalita® (2-3 feet), is odorless with sterile flowers that don’t produce seeds, and has no thorns; all qualities that add to its appeal for many gardeners. Senorita Rosalita’s purple-lavender blossoms are smaller than most cleome and unlike other varieties, are produced all along the stem, not just at the top.

And for a truly diminutive cleome, there’s ‘Linde Armstrong’ with rosy pink flowers atop 12-18 inch plants. This cleome is also thornless and noted for its heat and drought tolerance.

Cleomes will flower from summer through frost.

Best of all they are mostly rabbit, deer, and grasshopper proof.

Good Time to Give the Exterior Part of Your Home a Facelift

Old wood siding, fast becoming a dinosaur in new construction, regularly needs the protection of a new coat of paint, so I bought a Xboost Turbine Wagner sprayer (more power, less time) realizing I do not have to be fancy but just get paint on the bare wood. Plants and shrubs mostly cover the side of my house.

A good paint job can last 10 years. The key is proper preparation. Here are steps to take to make sure your exterior paint job looks great, adds value to your home, and lasts a long time.

Step 1: Get the Lead Out

Do-it-yourselfers are not obligated to follow EPA regulations for lead-safe practices, as professional paint contractors must. But if your home was built before 1978, when lead paint was banned for residential use, you should protect yourself and your neighbors from airborne lead particles.

Step 2: Wash the Exterior

Mildew thrives under fresh paint, which won’t adhere well to dirty, grimy, spore-sporting exterior walls. You can hand-apply the solution with a sponge, which will take forever and many trips up and down the ladder. Or, hire a pro to pressure wash siding—not a task for an amateur, who can damage siding by pushing water under boards.

Step 3: Scrape off Loose Paint

A handheld scraper is usually the best tool for the job, though you can also use a hot-air gun or infrared paint stripper. Never use an open-flame torch, which can easily start a fire and is illegal in most states unless you have a permit.

Step 4: Sand Rough Spots

A pad sander or random-orbit fitted with 80-grit sandpaper will smooth out any remaining rough spots. Take care not to push so hard that you leave sander marks in the wood. To be lead safe, use sanders fitted with HEPA filters.

Step 5: Fill and Repair

Fill minor holes or dings in the siding with a patching putty or compound such as Zinsser’s Ready Patch ($20 per gallon). If you’ve got a major rot problem, summon a carpenter to replace the bad wood. Also, fix drainage problems that cause water to pool and promote rot.

Step 6: Apply Primer

Apply primer immediately after preparing wood siding. White, gray, or tinted primer provides an even base for topcoats to adhere to, and a uniform canvas from which to survey your work. Small gaps in joints and around doors, windows, and other spots where horizontals meet verticals will all stand out in high relief, showing where you need to fill in with caulk.

If you’re painting over bare wood or existing latex paint, then latex primer is fine. But if you’re painting over multiple coats of oil-based paint, it’s best to stick with a new coat of oil-based primer.

Step 7: Caulk All Joints

Spring for the $7-a-tube polyurethane caulks with 55-year warranties, which will stand up to weather better than 35-year caulks that cost less than $3. The average house requires about seven tubes of caulk.

Step 8: Choose the Right Paint

Painting with water-based acrylic latex is so much easier than dealing with oil-based paints. If your house already sports an oil-based paint, which is more durable than latex, you’ll have to stick with it.

Choose finishes carefully. As a rule, the higher the sheen, the better the paint is at blocking the sun’s damaging rays. Satin is fine for shingles or clapboards, but you’ll want gloss paint to protect high-traffic parts of a house, such as window casings, porches, and doorframes. A gallon of premium exterior latex costs $35 to $45.

Step 9: Apply Top Coat(s)

Less is more when it comes to applying top coats. More layers can result in paint flaking off through the years; less paint bonds better to layers beneath.

If you’re going from a white house to yellow or cream, you might be able to get by with one coat. Going from a light to a dark house, and vice versa, usually requires two coats.